Step 5
Installing the power supply
Now that the motherboard is in place you can install the power supply. Some of you can skip this step because your case came with a power supply in it. But for some of you the power
supply that came with your case isn't going to be strong enough to run your system so you will have to swap it. Which is the case in my situation.
- First off, pull all the cables out to the side of the case. Ensure that no wires are tangled with the front panel wires.
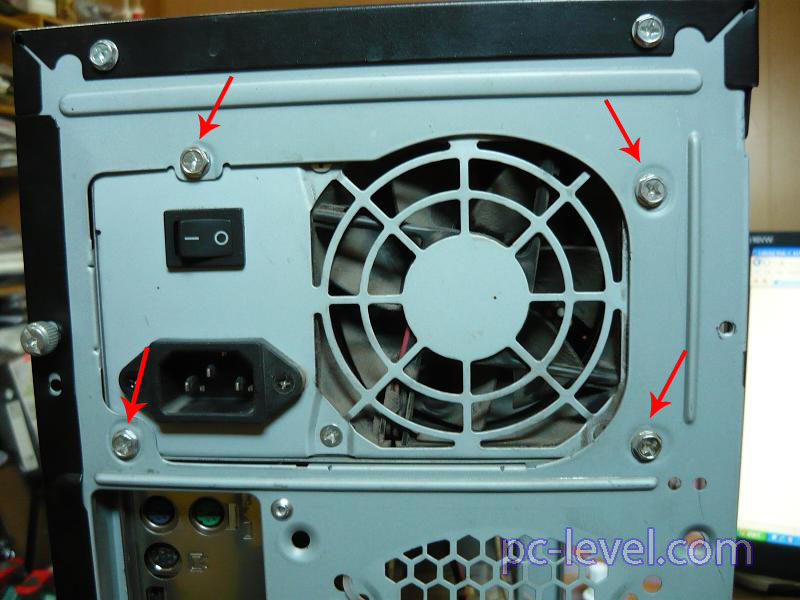 Now on the back panel of your case you will see where your powersupply is located. remove the 4 screws holding it in place. I found it best to remove the bottom screws first,
and top left screw last and support the power supply while removing the last screw to ensure it does not fall and damage your newly installed motherboard.
Now on the back panel of your case you will see where your powersupply is located. remove the 4 screws holding it in place. I found it best to remove the bottom screws first,
and top left screw last and support the power supply while removing the last screw to ensure it does not fall and damage your newly installed motherboard.
- Remove the power supply from the case and set it aside. Unpackage the new powersupply. Place it into position and install the screws into the same 4 corners you removed them
from. At this point we are not worried about connecting any wiring up. That will come later.
You have just installed or replaced your power supply.